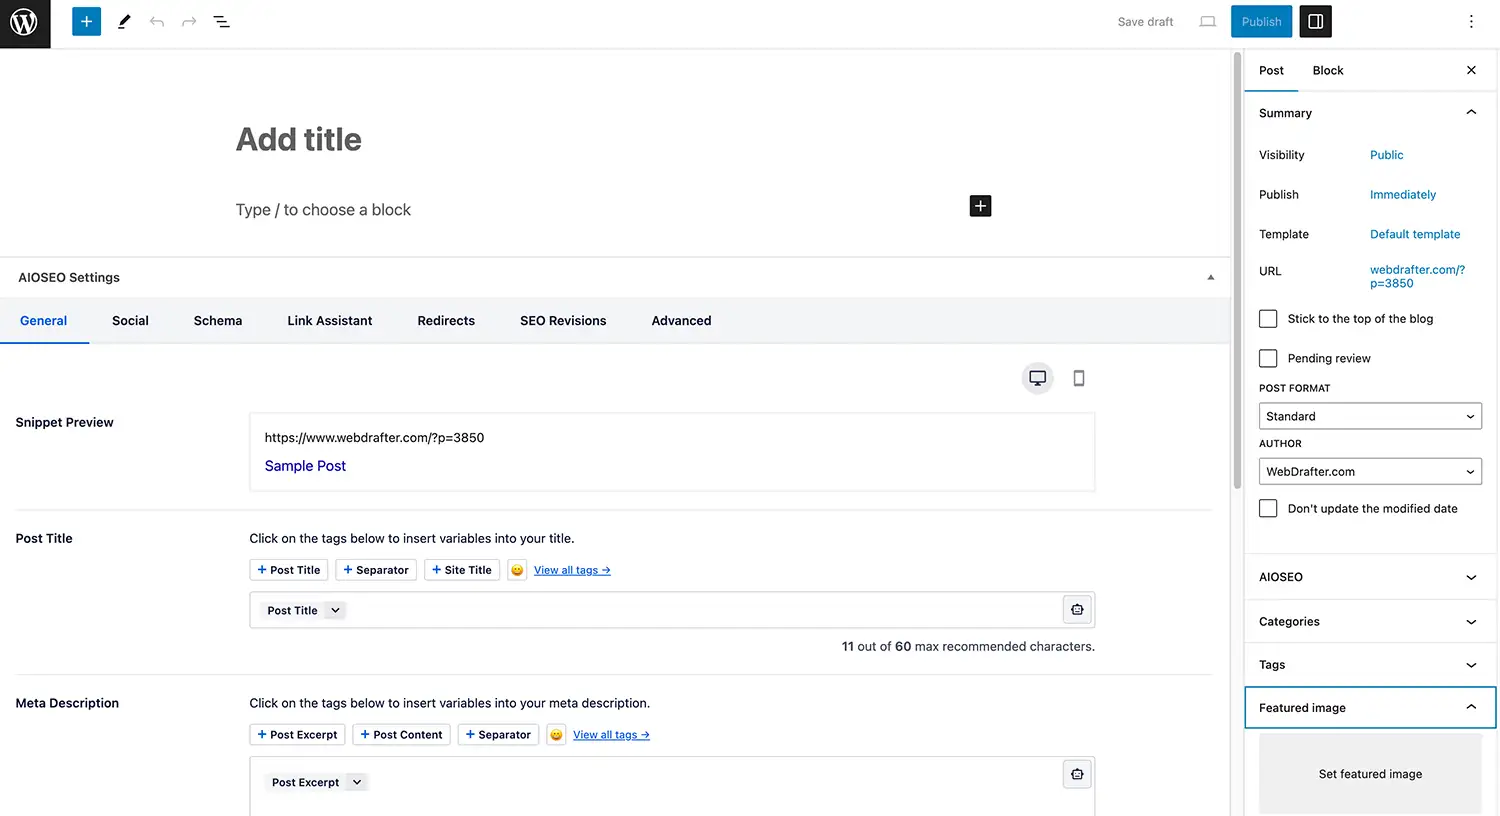
It’s easy to create a new blog post.
WordPress 5.0 rolled out with a new way of adding and editing content called Gutenberg. With it the editing experience shifted from basic text editing to a more drag and drop functionality where blocks replaced the standard TinyMCE editor. Blocks gave users a visual way of laying out their content. It’s also worth mentioning that Elementor, one of the most popular WordPress editors similarly gives users the ability to drag and drop elements. Want to see more about Elementor? See Creating and Editing a Post with Elementor.
Once you’re logged into your WordPress website follow these steps:
1. On the left-hand sidebar click the “Posts” link. This will show you all of the posts that are currently on the website.
2. To add a new post, under the link “Posts” click the navigation item “Add New.” This will take you to the new post page where you will create your desired post.

3. Add a Title. The title is also what is used for the page URL. Make sure it’s to the point and accurate.
4. Adding content. Your content will be added where it reads “Type / to choose a block”. In here you can simply type the content you wish to have show on the post. If you have your content in a document, it can be as simple as copying everything from the document and pasting it in this section!
5. Additional Information. Your posts can have more than just written content. If your posts are categorized, make sure to add the appropriate category from the right-hand sidebar item labeled “Categories.” Another important piece of the puzzle is the Featured Image. These are typically the images that show on the blog listings page so make sure it’s a good picture that is relevant to the content being published and make sure it’s optimized for the web.
6. Once you have finished adding the desired content simply click the “Publish” button on the upper right-hand corner. Congratulations! Your post is now live!


